
Building Ai-dentikit

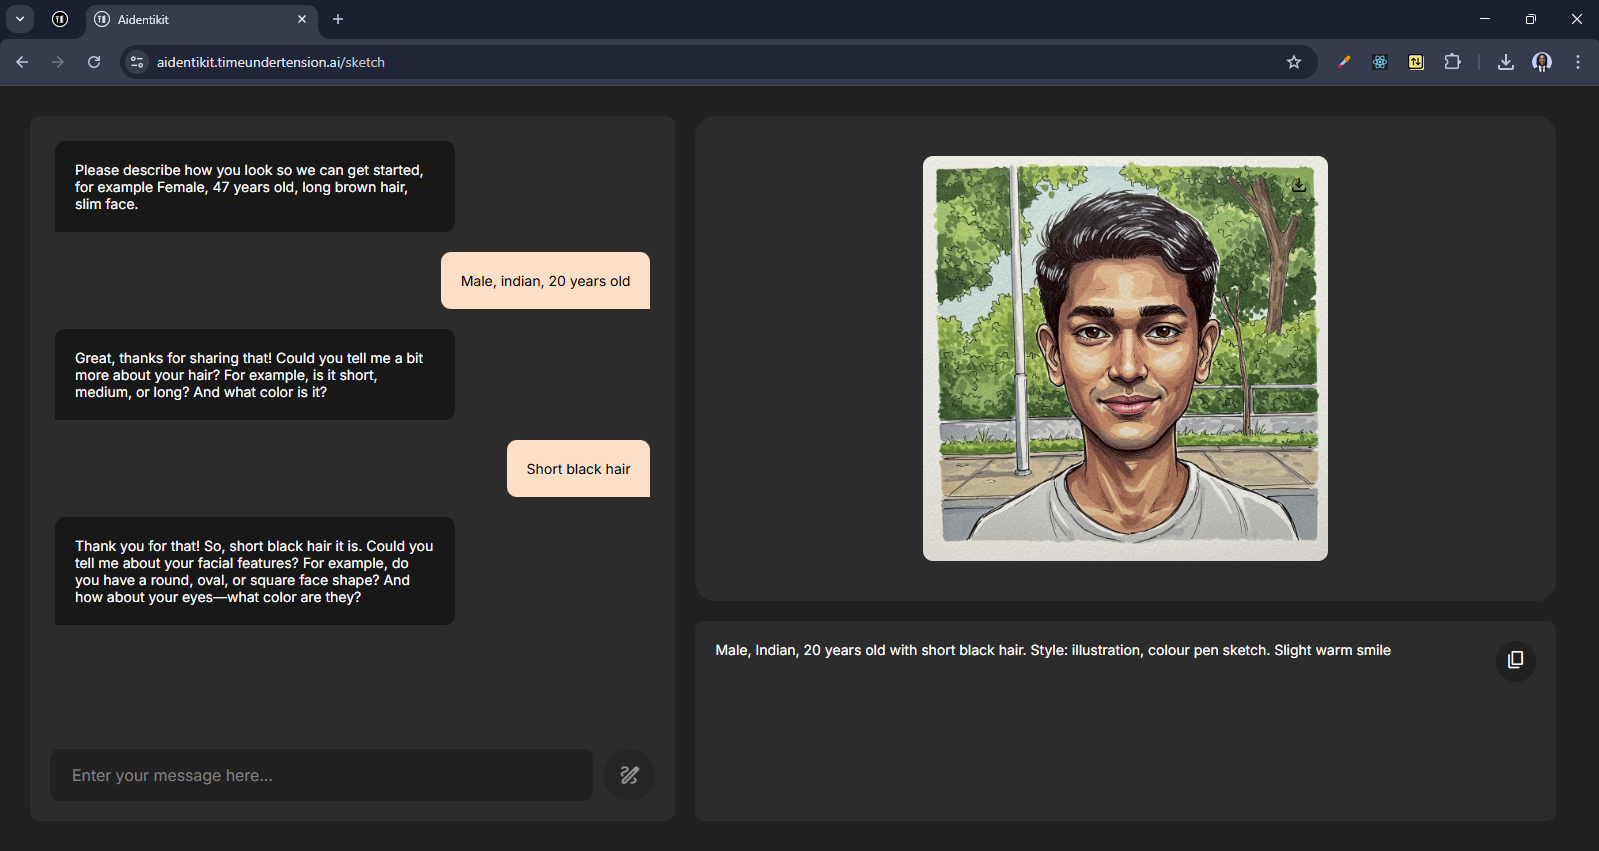
Ai-dentikit home screen
AI-dentikit is a fun little app I built that lets you create a sketch of yourself just by describing your appearance to an AI. The idea is similar to how police sketch artists work when they ask witnesses to describe a suspect's features to create an identikit. Except here, you’re chatting with an AI and seeing the sketch come to life in real-time.
The whole process is powered by an LLM (Language Model) that takes your descriptions and generates a portrait that hopefully resembles what you had in mind. In this article, I’ll walk you through how I built AI-dentikit, some of the technical challenges I ran into, and what I learned along the way. If you’re an AI engineer or just someone curious about how AI-powered apps like this come together, hopefully, you’ll find something useful here.
Project Overview
AI-dentikit is built as a straightforward web app with two main parts: a React frontend and a NestJS backend. The React app handles the user interaction, guiding them through a friendly chat-like process where they describe their appearance. The backend, powered by NestJS, handles the communication between the frontend and the image generation model. All documents are stored in a MongoDB database. All resources were deployed to Microsoft Azure.
The actual sketch generation happens thanks to the Gemini Imagen 3 API, which transforms the user’s text descriptions into detailed, sketch-like images. The React app sends user descriptions to the backend, which then makes requests to the Gemini Imagen 3 API to generate the images. Once the sketches are ready, they’re sent back to the React app for display.
Technical Development Process

Building AI-dentikit involved a lot of tinkering with different tools and dealing with unexpected issues. Here’s how the process went:
A. Choosing the Tech Stack
I decided to go with React for the frontend and NestJS for the backend because they’re both powerful, well-documented frameworks that make building web apps a lot easier. React’s component-based architecture made designing the UI intuitive, while NestJS provided a clean way to handle backend logic and routing. Plus, having used them before, I felt pretty comfortable setting things up and getting everything to work smoothly.
B. Tackling Image Generation Challenges
The image generation part of AI-dentikit was where things got tricky. The idea was simple: take user descriptions and turn them into identikit sketches using the Gemini Imagen 3 API. But of course, it didn’t go perfectly.
One of the first problems I ran into was related to prompt adherence. For example, when users described themselves with “no facial hair,” the model would still sometimes generate sketches with facial hair. To try and fix this, I looked into something called negative prompting.
Negative Prompting involves specifying things you don’t want to see in the generated image, making the model more likely to produce what you actually want. Unfortunately, it turned out that Imagen 3 doesn’t support negative prompting. So, I tried switching to Imagen 2, which does support negative prompting. But the results were disappointing—the image quality was noticeably worse.
In the end, I chose to prioritize image quality over prompt adherence, deciding it was better to have high-quality sketches that weren’t always perfect than low-quality sketches that were closer to what the user described.
C. Security & Input Handling
Building a public-facing app meant dealing with potential security risks, especially since users are providing text descriptions.
Two major things I focused on were:
XSS Attacks (Cross-Site Scripting):
Since the user description input field could be a potential vulnerability, I made sure to sanitize all user inputs on the client side before sending them to the server.
Additionally, server-side sanitization was added as a second line of defense.
Handling Malicious Inputs:
I put checks in place to ensure that users couldn’t submit huge amounts of text in a single input, which could potentially overload the backend or cause other performance issues.
Security is something that should be at the forefront of a developer’s mind, and these basics are a good start.
D. UI Optimization & User Experience
Once the backend was working well enough, I turned my attention to making the app more user-friendly and polished.
I added a splash screen to make the app feel more welcoming and give it some personality.
Made sure the app was fully mobile-friendly, considering that many users would likely try it on their phones.
Tried to keep the UI as simple and intuitive as possible, so the focus would be on the conversation and the resulting sketch rather than unnecessary complexity.
Dos and Don'ts: Key Learnings
Dos:
Prioritize User Experience: Keep the UI clean, responsive, and intuitive.
Double Down on Security: Sanitize inputs on both the client and server sides to prevent potential attacks.
Experiment with Tools & Models: Trying out different approaches (e.g., negative prompting with Imagen 2) can provide useful insights.
Deploy quickly and get feedback: The best way to guide your development is from user feedback ~ they’ll let you know what features need improvement and what can be removed
Don'ts:
Don’t Sacrifice Quality Unnecessarily: Prioritize image quality where it matters most, even if it means working around limitations. (e.g., choosing Imagen 3 over Imagen 2 despite lack of negative prompting).
Don’t Ignore Security Risks: Even small vulnerabilities can be exploited if not properly addressed. Security should be at the forefront of your development.
Conclusion
Building AI-dentikit was a fun yet challenging experience that pushed me to find creative solutions for some pretty interesting problems. From experimenting with negative prompting to making sure the app was secure and user-friendly, there was a lot to figure out along the way. But that’s what made it exciting.
Hopefully, sharing this process helps anyone trying to build something similar or just interested in how AI-powered apps come together.
Cheers,